How to Make Over an Ensuite Bathroom on a Budget
A full bathroom renovation can easily become expensive, but doing some of the work yourself and finding creative ways to reuse existing pieces can make a huge difference.
We managed to completely transform our dated ensuite bathroom for around $4,500.
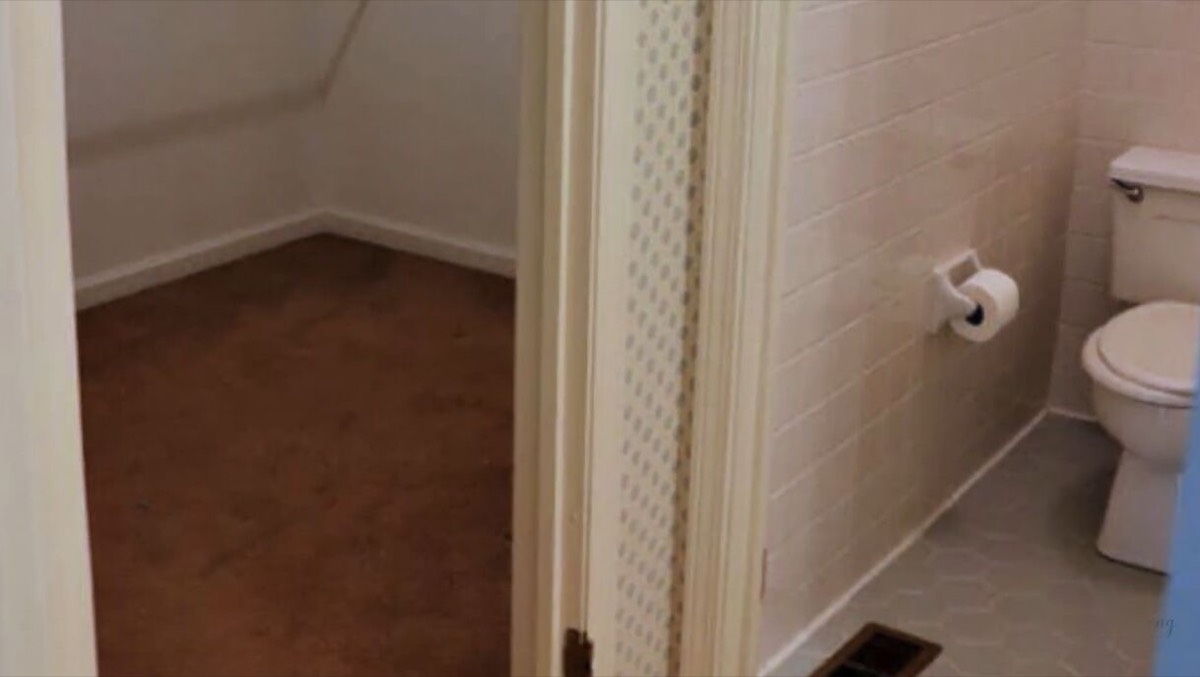
The original bathroom had busy 1980s wallpaper, yellowed paint, an awkward layout, and a toilet that made getting in and out of the shower difficult. By reworking the layout, tackling some projects ourselves, and knowing when to bring in a professional, we created a much more practical bathroom without a huge renovation budget.
Here’s how we did it.
1. Decide what needs to change
Before you start demolishing anything, work out which problems actually need solving.
Before you start demolishing anything, work out which problems actually need solving.
For us, the biggest issue was the toilet. It stuck out so far that getting in and out of the shower required maneuvering around it, and even closing the bathroom door was difficult.
Next to the bathroom was an oversized walk-in closet with a lot of poorly used space. We decided to close the existing doorway between the bathroom and closet, create a new closet entrance from the bedroom, and borrow a small section of the closet to give the bathroom more room.
That allowed us to move the toilet into a recessed nook where it would have much more privacy.
2. Know when to hire a professional
DIY can save a considerable amount of money, but there are some jobs you shouldn't attempt unless you know what you're doing.
Our general rule is to hire someone when a mistake could cause a fire, leak, or structural damage. For this renovation, that meant hiring a plumber rather than attempting to move the plumbing ourselves.
If you're renovating on a budget, get several quotes and consider independent tradespeople as well as larger companies. Just make sure anyone you hire has the appropriate qualifications, licensing, and insurance required where you live.
Our plumber established exactly where the toilet could be moved based on the existing plumbing. Once we knew the limitations, we could design the new layout around them.
3. Demolish the old bathroom
Next came demolition.
We removed the old wallpaper, cabinetry, wall finishes, tile, and bathtub. Taking out the tub was one of the messiest parts of the entire renovation.
If you're doing demolition yourself, use appropriate protective equipment, including gloves, eye protection, and a suitable mask or respirator. Before disturbing older walls, flooring, adhesives, or other building materials, also check whether testing for asbestos, lead, or other hazardous materials is appropriate for the age of your home.
Once the old shower surround was gone, we were also able to raise the ceiling above the shower. The original ceiling had made the shower feel particularly low and enclosed, so gaining that extra height immediately opened up the space.
4. Create a private toilet nook
With the room stripped back, we could begin rebuilding around the new layout.
The plumbing meant we couldn't move the toilet very far, but we didn't need to. We framed a new wall using a small amount of space taken from the master closet.
There wasn't enough room to add a separate door to the toilet area, but the new wall created a nook around the corner. This gave the toilet much more privacy without requiring a large structural change.
It's a good reminder that improving a layout doesn't necessarily mean moving everything. Sometimes shifting one fixture a relatively short distance can solve the problem.
5. Install a walk-in shower
We decided to replace the bathtub with a walk-in shower.
Although we were willing to tackle the wall tile ourselves, creating a tiled shower pan felt too complicated for a first tiling project. Getting the slope, waterproofing, and drain installation right is critical, so instead we installed a ready-made cast-iron shower pan.
Once the shower base and required waterproofing were installed, we tiled the shower walls ourselves. It was our first tiling project, so it was intimidating at first, but doing this portion ourselves helped keep the renovation costs down.
We also chose a shower fixture with two options: a fixed overhead stream and a detachable handheld shower head. The handheld option is particularly useful for rinsing the shower as well as everyday use.
6. Add shiplap and color to the walls
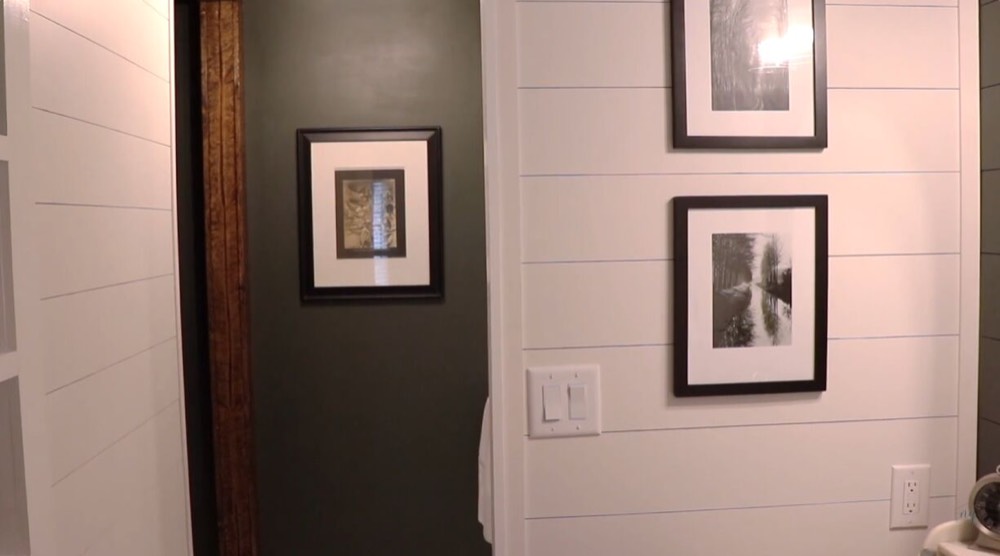
To give the bathroom a farmhouse feel, we added shiplap to the walls.
Rather than making everything white, I used two complementary colors. The wall behind the vanity was painted a deep magnolia-leaf green, while the shiplap was painted white.
The darker accent wall adds depth and helps the vanity stand out, while the white keeps the relatively small bathroom feeling bright.
7. Turn an old dresser into a vanity
One of my favorite finds for the bathroom came from Facebook Marketplace: an old dresser with a marble top.
Instead of purchasing a new bathroom vanity, we converted the dresser into one. We altered the drawers where necessary to accommodate the sink plumbing and added a vessel sink on top.
Repurposing furniture can be a great way to save money while giving a bathroom more character than you might get from a standard vanity. Just make sure the piece is suitable for a humid bathroom environment and that any alterations still leave it structurally sound.
8. Turn the old doorway into storage
After changing the closet entrance, we still needed to deal with the old doorway between the closet and bathroom.
We happened to have a bookcase sitting in the closet, and I realized it looked almost exactly the same size as the old doorway. We tried moving it into the opening, and it was a perfect fit.
Instead of simply filling in the doorway, we gained useful bathroom storage for towels, toiletries, and other necessities. We added shiplap behind the shelving so it looked like an intentional part of the new bathroom.
Before closing an old opening permanently, consider whether the space could become recessed shelving or another useful storage area.
9. Add warmth with a wood-plank ceiling
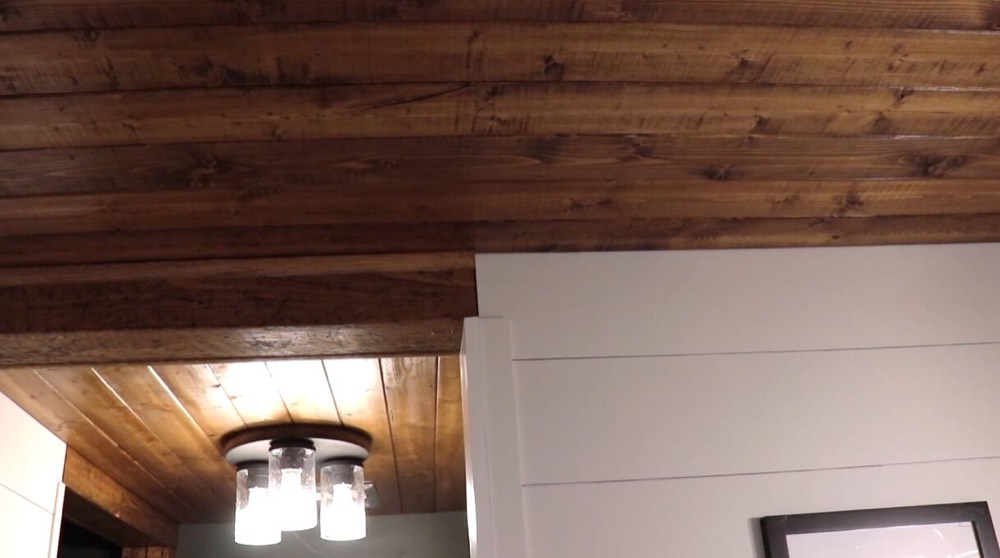
I didn't want the finished bathroom to feel too stark, so we covered the ceiling with stained wood planks.
The wood adds warmth and coordinates with the existing hardwood flooring. We also created the appearance of rustic beams using wood that we weathered, sanded, and stained.
These details helped balance the white shiplap and give the bathroom the cozy look we wanted.
10. Update what you can instead of replacing it
Not everything in a renovation needs to be new.
We kept the existing light fixture but replaced its dated globes with updated seeded-glass versions. This gave the fixture a completely different appearance for much less than replacing the entire thing.
A large round mirror completed the vanity area.
Before throwing something out, consider whether paint, new hardware, different shades, or another small modification could make it work with your new design.
Our finished bathroom isn't an enormous luxury ensuite, but that wasn't the goal. We wanted to fix an awkward layout and create a bathroom that worked better for our family without spending a fortune.
The biggest savings came from being selective about where we spent our money. We hired a professional for work we weren't qualified to handle, but tackled projects such as tiling, painting, shiplap, and finishing ourselves. We also repurposed furniture, reused an existing light fixture, and turned an unwanted doorway into useful storage.
With careful planning and a willingness to work with what you already have, even a relatively modest renovation budget can completely change how a bathroom looks and functions.